Tag: grilling

  • Barbecued Rosemary Chicken

    Barbecued Rosemary Chicken

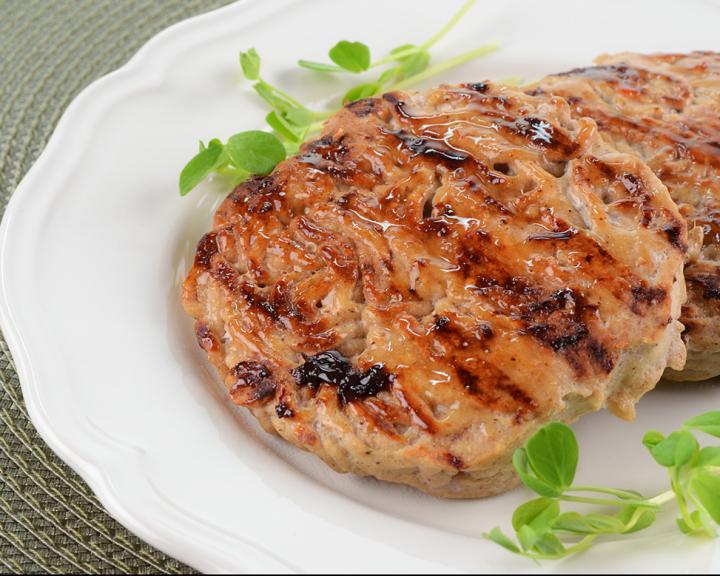
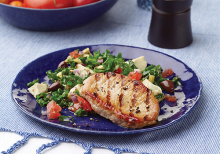
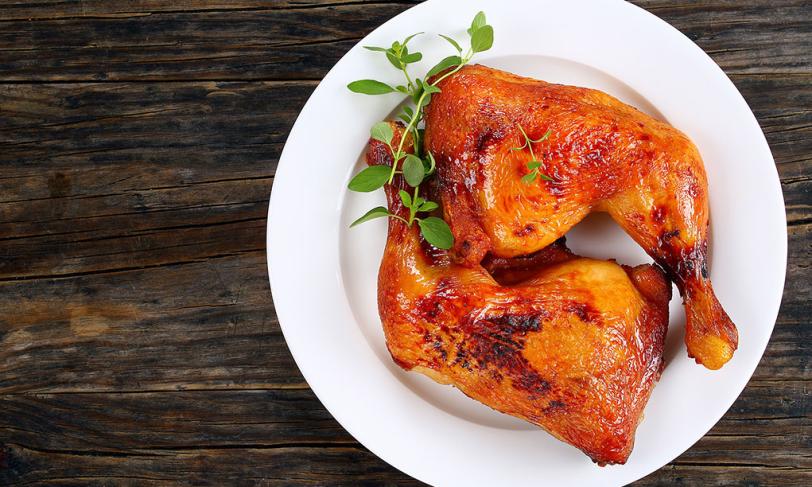
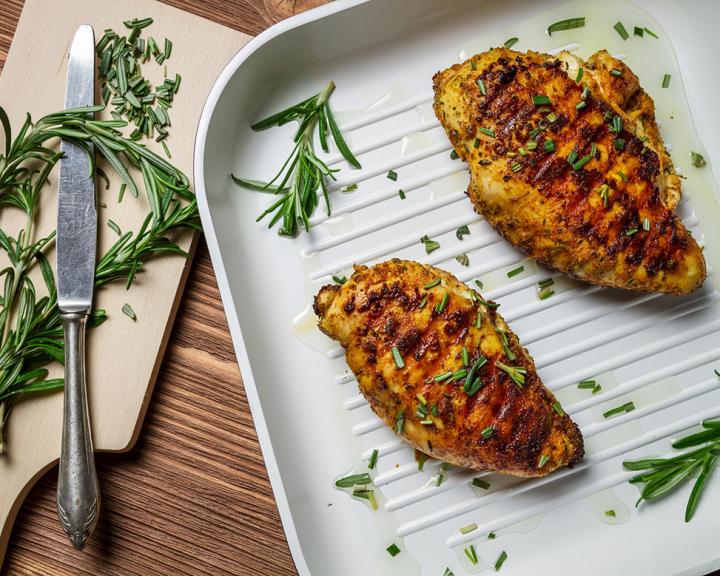
    How to Make Barbecued Rosemary Chicken

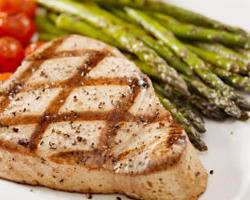
    Try this classic recipe that’s been spiced up with some fresh rosemary to make a diabetes-friendly dish that’s bursting with flavor. To take full advantage of the late-summer fresh produce harvest, pair with our Sauteed Asparagus, Peppers, and Mushroom recipe!


    30 min prep time


    10 min cook time


    2servings


    3 ounces chicken + 2 Tbsps. sauce

    Print Recipe >

    Step-By-Step Instructions:

    1. In a nonmetallic bowl, stir together the oil, lemon zest, lemon juice, garlic, rosemary, salt, and pepper. Add the chicken, turning to coat. Cover and refrigerate for 30 minutes to 8 hours. If marinating for more than 30 minutes, turn several times.
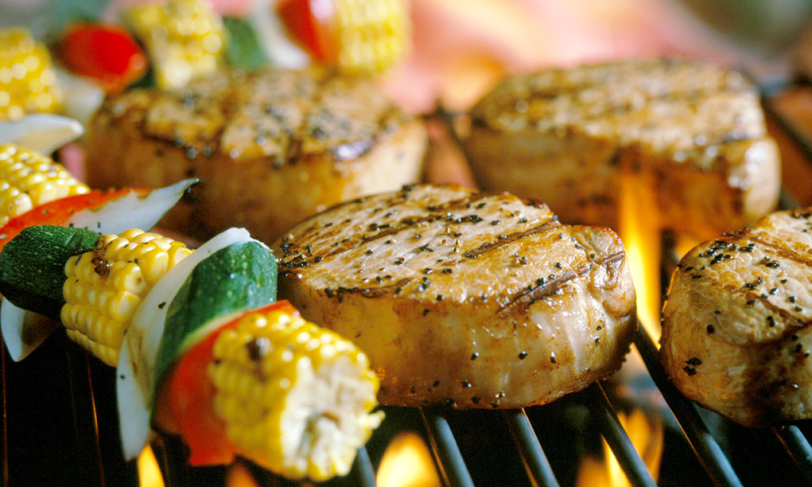
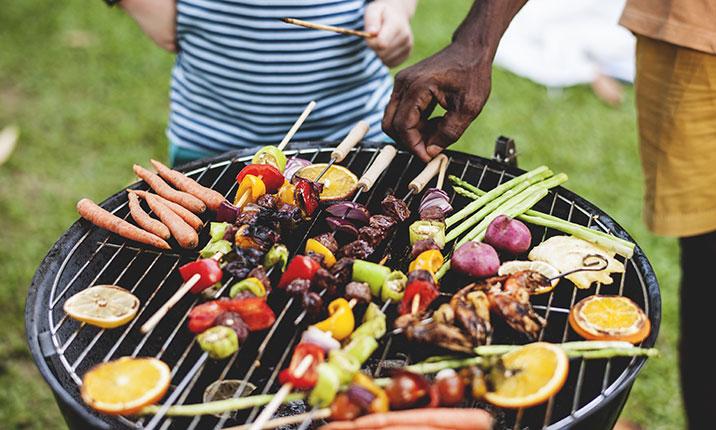
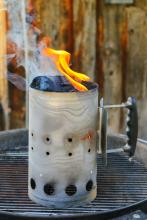
    2. Lightly spray the grill rack with cooking spray. Preheat the grill on medium heat.
    3. Grill the chicken for 4 to 5 minutes on each side, or until no longer pink in the center. (The internal temperature should reach at least 165 degrees F). Transfer to plates.
    4. Meanwhile, in a small saucepan, whisk together the barbecue sauce, vinegar, and honey. Cook over medium-low heat for 3 to 4 minutes, or until heated through, stirring occasionally. Spoon the mixture over the cooked chicken.
    pinterestfacebooktwittermail

    Nutrition facts

    2 Servings


    • Serving Size

      3 ounces chicken + 2 Tbsps. sauce


    • Amount per serving


      Calories


      235

    • % Daily value*

    • Total Fat
      7g

      9%

      • Saturated Fat
        1.4g

        7%

    • Cholesterol
      65mg

      22%

    • Sodium
      390mg

      17%

    • Total Carbohydrate
      17g

      6%

      • Dietary Fiber
        0g

        0%
      • Total Sugars
        13g

    • Protein
      24g

    Ingredients

    olive oil
    2 tsp

    lemon zest (grated)
    1 tsp

    fresh lemon juice
    1 tbsp

    medium garlic (minced)
    1 clove

    fresh rosemary (chopped)
    1 tbsp

    salt
    1/8 tsp

    pepper
    1/8 tsp

    chicken breast halves (boneless, skinless, about 4 ounces each, all visible fat discarded)
    2

    nonstick cooking spray
    1

    barbeque sauce (lowest sodium available)
    3 tbsp

    balsamic vinegar
    1 tbsp

    honey
    1 tsp

  • Aztec Turkey Quinoa Burgers

    Aztec Turkey Quinoa Burgers

    How to Make Aztec Turkey Quinoa Burgers

    Pair these delicious turkey burgers with a side of nonstarchy vegetables like steamed broccoli.


    6servings


    1 burger

    Print Recipe >

    Step-By-Step Instructions:

    1. In a large bowl, combine all ingredients and mix well to distribute. Shape into 6 patties.
    2. Preheat grill to medium high and place burgers on grill grate. Cook under direct heat (with the grill closed) for 5-6 minutes per side until cooked through to doneness.
    pinterestfacebooktwittermail

    Nutrition facts

    6 Servings


    • Serving Size

      1 burger


    • Amount per serving


      Calories


      175

    • % Daily value*

    • Total Fat
      11g

      14%

      • Saturated Fat
        2.3g

        12%

    • Cholesterol
      55mg

      18%

    • Sodium
      60mg

      3%

    • Total Carbohydrate
      4g

      1%

      • Dietary Fiber
        1g

        4%
      • Total Sugars
        1g

    • Protein
      16g

    • Potassium
      245mg

      5%

    Ingredients

    ground chicken (or lean ground turkey)
    1 lbs

    quinoa (cooked, golden or red)
    1/3 cup

    green onion (scallion) (minced)
    3

    kale (chopped)
    1/2 cup

    Extra Virgin Olive Oil
    2 tbsp

    cumin
    1/2 tsp

    dried oregano
    1 tsp

    chili powder
    1 tsp

    chipotle chili in adobo (minced, optional)
    1

  • Asian Tuna Salad

    Asian Tuna Salad

    How to Make Asian Tuna Salad

    This Asian Tuna salad is a perfect for the foodie chefs out there looking for a healthy entree with an Asian zing!


    20 min prep time


    4servings


    1.5 cups salad with just under 4 oz. fish

    Print Recipe >

    Step-By-Step Instructions:

    1. Preheat an indoor or outdoor grill.
    2. In a small bowl, whisk together the soy sauce, Splenda Brown Sugar, hot sauce (optional) and black pepper. Set aside.
    3. Spray the indoor grill with cooking spray. Or, if using an outdoor grill ensure the grates are cleaned and lightly oiled.
    4. Brush tuna and asparagus with the soy sauce marinade. Place onto grill. Grill the tuna for 3 minutes on each side. Grill asparagus, turning often, until beginning to soften (about 6-8 minutes). Remove tuna and asparagus from grill, sprinkle with sesame seeds and set aside to cool. Tuna should be slightly pink in the center but not raw.
    5. Toss the lettuce, red bell pepper and cucumber in a salad bowl.
    6. In a small bowl whisk dressing ingredients. Pour over salad and toss gently to coat. Divide the salad equally among four plates.
    7. Once tuna and asparagus are cool to room temperature or slightly warmer, slice the tuna and divide equally among the four salads (just under 4 ounces of tuna per salad). Lay it gently on top of the salad.
    8. Cut the asparagus spears in half and lay them around the edge of the salad.
    pinterestfacebooktwittermail

    Nutrition facts

    4 Servings


    • Serving Size

      1.5 cups salad with just under 4 oz. fish


    • Amount per serving


      Calories


      265

    • % Daily value*

    • Total Fat
      6g

      8%

      • Saturated Fat
        0.7g

        4%

    • Cholesterol
      60mg

      20%

    • Sodium
      350mg

      15%

    • Total Carbohydrate
      18g

      7%

      • Dietary Fiber
        4g

        14%

    • Protein
      34g

    Ingredients

    light or reduced sodium soy sauce
    2 tbsp

    low-calorie brown sugar substitute
    1 1/2 tbsp

    Asian Hot Sauce (Siracha, optional)
    1 tsp

    black pepper
    1/4 tsp

    nonstick cooking spray
    1

    fresh albacore tuna
    1 lbs

    asparagus (trimmed)
    1 lbs

    sesame seeds
    1 tsp

    spring mix lettuce (washed and dried (or spun in a salad spinner))
    6 cup

    red bell pepper (julienned)
    1 large

    cucumber(s) (seeded and julienned)
    1 med

    rice wine vinegar
    1/4 cup

    low-calorie brown sugar substitute
    1 tbsp

    toasted sesame oil
    1 tbsp

    black pepper
    1/8 tsp

  • Grilled Shrimp Tacos

    Grilled Shrimp Tacos

    How to Make Grilled Shrimp Tacos

    Here’s a light and tasty summer taco recipe that’s great for a family dinner or the next time you have guests. These tacos are delicious as is, or with different toppings. Try pico de gallo, halved cherry tomatoes, sliced radishes, onion, shredded cabbage, or even half of a grilled peach.


    15 min prep time


    8 min cook time


    4servings


    1 taco

    Print Recipe >

    Step-By-Step Instructions:

    1. Preheat an indoor or outdoor grill.
    2. In a small bowl, whisk together the yogurt, mayonnaise, and chili powder. Cover and keep in the refrigerator until needed.
    3. Skewer 3 ounces of shrimp on each skewer.
    4. In a small bowl, whisk together olive oil, garlic, lime juice, salt (optional) and pepper. Brush the shrimp with the marinade and grill for 3-4 minutes on each side until the shrimp are pink and just firm. Continue to brush with the marinade while grilling, using all of the marinade.
    5. Heat the corn tortillas briefly on the grill. Remove the shrimp from one skewer and place in a tortilla. Top the shrimp with 1/4 cup shredded lettuce, a heaping tablespoon of the reserved yogurt sauce, and 2 tablespoons of salsa verde, and about 2 teaspoons cheese. Repeat for the remaining three tacos.
    pinterestfacebooktwittermail

    Nutrition facts

    4 Servings


    • Serving Size

      1 taco


    • Amount per serving


      Calories


      220

    • % Daily value*

    • Total Fat
      8g

      10%

      • Saturated Fat
        1.6g

        8%

    • Cholesterol
      150mg

      50%

    • Sodium
      390mg

      17%

    • Total Carbohydrate
      17g

      6%

      • Dietary Fiber
        2g

        7%
      • Total Sugars
        2g
      • Added Sugars
        0g

        0%

    • Protein
      23g

    • Potassium
      380mg

      8%

    Ingredients

    Greek yogurt (plain, non-fat)
    1/4 cup

    light mayonnaise
    2 tbsp

    chili powder
    1/2 tsp

    shrimp (peeled and deveined)
    12 oz

    long bamboo skewers (soaked in warm water)
    4

    olive oil
    1 tbsp

    garlic (minced or grated)
    2 clove

    lime (juiced)
    1

    salt (optional)
    1/2 tsp

    black pepper (ground )
    1/4 tsp

    corn tortillas (6-inch)
    4

    lettuce (shredded)
    1 cup

    salsa verde (tomatillo salsa)
    1/2 cup

    cotija or feta cheese
    2 1/2 tbsp

  • Diabetes-Friendly Grilling with Pork

    Diabetes-Friendly Grilling with Pork

    Did you know that grilling is a diabetes-friendly cooking method? Cooking over an open flame doesn’t require adding any oil, and fat can drip off whatever you are cooking, making for a lower fat meal. Read on for more grilling tips from the National Pork Board and some of our favorite grilling recipes.

    Tips for Grilling Pork

    • To prevent pork from sticking to the grate, scrub grates clean and coat with vegetable oil or a nonstick vegetable oil spray prior to using.
    • Do not use sharp utensils that may pierce the pork when flipping, as piercing allows flavor-filled juices to escape. Use spatulas or tongs for turning.
    • Frequently flipping pork on a cooler area of the grill is better than accidentally burning it on an area that is too hot.
    • Sugar-based sauces (many commercial barbeque sauces) tend to burn if applied too early. Baste during the last few minutes of cooking.
    • To check cooking temperature when using charcoal:
      • Low – Ash coat is thick, red glow less visible
      • Medium – Coals covered with light-gray ash
      • High – Red glow visible through ash coating 

    Because pork cuts will cook differently depending on their size and thickness, it is important to monitor pork temperature with a digital thermometer when grilling.
     
    Enjoy the best eating experience when cooking cuts such as pork chops and pork tenderloin between 145 degrees F. (medium-rare) and 160 degrees F. (well), with a 3-minute rest time after leaving the grill. Ground pork should always be cooked to 160 degrees F. 

    Recipes

    Browse grilling recipes

    Grilled Pork with Tomato, Artichoke, and Kale Salsa

    Image
    RecId_734_2Step_GrilledPorkWithTomatoKalamataAndKaleSalsa_022618.png

    Grilled Pork Tenderloin with Peach Salsa

    Image
    284-diabetic-pork-tenderloin-mango-salsa_225745699_061419.png

    Budget-Friendly Pork Chops with Peach Salsa

    Image
    augsep13_pork_chop_mango_istock5581414_279x200.png

    Pork and Avocado Salad

    Image
    RecId_795_Pork-and-avocado-salad-wraps-with-cranberry-splashed-ginger-tea_4IngredientCookbook_022518.png


  • Slideshow: Weeknight Chicken Dinners

    Slideshow: Weeknight Chicken Dinners

    Busy weeknights call for quick and easy recipes that can go from pantry to plate in less than 30 minutes (and without leaving a mess in the kitchen). We’ve compiled our favorite diabetes-friendly weeknight dinners featuring chicken that can be ready in a snap and come together with just a few dishes.

    10 Quick & Easy Chicken Dinners

  • Slideshow: Diabetes-Friendly Grilling Recipes

    Slideshow: Diabetes-Friendly Grilling Recipes

    Now that warmer weather is settling in, it’s time to invite friends and family over to grill out in the backyard. Your neighbor is bringing the coals, your uncle has packed a radio, but what about the star attraction—the food? Not to worry. We pulled together this list of quick, easy, and delicious grilling recipes from Diabetes Food Hub. Each one is a guaranteed hit.

    Slideshow: Fire It Up! 10 Grill-Ready Recipes

  • 5 Tips for Better Grilling this Summer

    5 Tips for Better Grilling this Summer

    Nothing says “SUMMER!” better than a cookout! Grilling is a great, diabetes-friendly cooking method. Cooking over an open flame doesn’t require adding lots of oil, and the smoke adds delightful flavor to lean meats, vegetables, and even fruit. Plus, it’s a great way to get outside and enjoy food with friends and family. Read on for everything you need to know to get grilling this summer!

    Check out this recipe round-up for some of our favorite grilling recipes to try this summer!

    1. Gas or charcoal?

    Image
    82_gas-v-charcoal.jpg

    The first question any aspiring griller must tackle: charcoal or gas? Each has its advantages.

    Charcoal grills are thought to give food more of a smoky flavor (as do any flavored wood chips you add). They’re also generally cheaper than gas grills. 

    But charcoal is messier and takes more work. Gas grills need less supervision and they’re more predictable—you can control the heat with the turn of a dial.

    2. Gather your tools

    Image
    82_grilling-tools.jpg

    Depending on what you’re planning to cook, you’ll also want to gather some or all of the following:

    • A pair of long-handled tongs for moving food around the grill.
    • A large spatula for flipping burgers or turning whole fish.
    • Elbow-length oven mitts, hot pads, and dish towels.
    • A long-handled pastry brush for applying sauces and glazes.
    • Skewers. Soak wood skewers in water for about 30 minutes before using so that they don’t burn on the grill. Use two skewers to keep food from spinning  or rolling around on the grill.
    • A side table to hold plates, food, etc.
    • Clean plates and platters for food coming off the grill (don’t put cooked food on the same dishes that held raw meat).
    • Heavy-duty aluminum foil to package up delicate vegetables.
    • An instant-read thermometer to check the internal temperate of meats. 

    3. Do your prep work

    Preparation is key no matter how you’re cooking, but when you’re working on the grill, it’s particularly crucial. If you gather all your supplies and do all the food prep in advance, you won’t have to leave the grill unattended while you run inside. 

    Always make sure your grill grate is clean before you start cooking. For best results, scrud a metal grate with a wire brush (or a big wad of crumpled foil) after it begins to warm up.

    Finally, wait until your grill is thoroughly heated before beginning to cook. 

    4. Light it up

    Image
    82_charcoal-chimney.jpg

    If you’re using charcoal, natural hardwood charcoal is the best choice because it burns cleaner and hotter than briquettes. But if you use briquettes, avoid the self-lighting kind, which are saturated with petroleum. 

    You can use starter fluid if you like, or use a chimney starter: load the top of the metal canister with charcoal, stuff newspaper in the bottom, and light the paper with a match. The updraft spreads the fire from the paper to the charcoal and in 30 minutes the coals will be evenly heated and glowing. Carefully dump the coals from chimney onto the grill and spread them evenly. 

    Remember, don’t use gasoline or highly volatile fluids to ignite charcoal. And never add lighter fluid to an existing fire. 

    5. Get grilling

    The two main methods of grilling are direct heat and indirect heat. In direct grilling, the foods sits right over the heat source. This is best for foods that you want to cook quickly like vegetables, lean fish, and small pieces of chicken.

    In indirect grilling, the heat source is kept on one side of the grill, and the food sits on the opposite, cooler side. This method cooks the food at a lower temperate for a longer. It’s best for tough cuts of meat, large roasts, and whole chickens or turkeys.

    Don’t place foods too close together on the grill; air needs to circulate around the food so that it sears properly, and your fire also needs air to stay lit. 

    Don’t move the food around too often. You won’t have sticking problems if you let the food really sear and turn only once. 

    There are many grilling recipes on Diabetes Food Hub! Check out this recipe round-up for a few of our favorites to get you started.

  • Top 20 Recipes of 2018

    Top 20 Recipes of 2018

    As we move into the new year and thoughts turn to healthy resolutions and diabetes meal planning, the Diabetes Food Hub team looked back at the first year of the site and reviewed the most popular recipes as determined by, you, our visitors. Favorites ranged from a low-carb chicken and mushroom superstar to breakfast frittatas just begging for a personal spin. Altogether, they make a fantastic round up of meals designed to help you be the best you in 2019 and beyond. Click on the slideshow below to see the top crowd pleasers of 2018.

    The Top 20 Diabetes Food Hub Recipes of 2018