Tag: dinner

  • Instant Pot Asian Spaghetti Squash

    Instant Pot Asian Spaghetti Squash

    How to Make Instant Pot Asian Spaghetti Squash

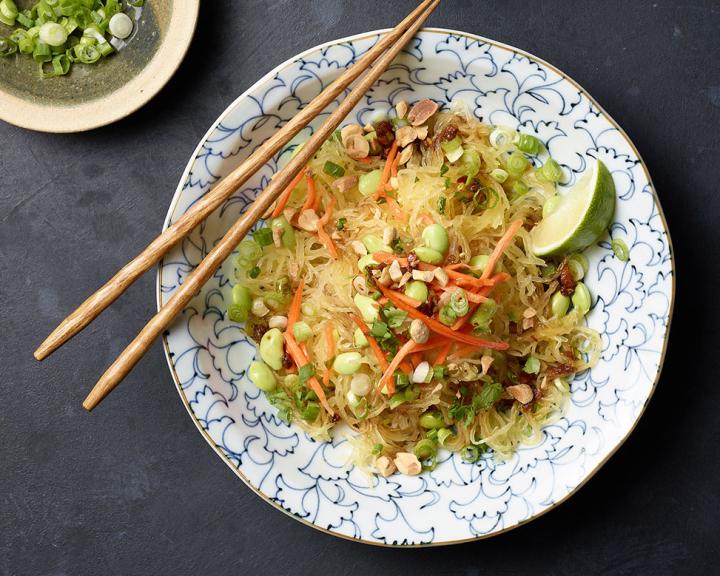
    Spaghetti squash is a great low-carb alternative to grain-based noodles, especially in Asian dishes where it’s light texture is similar to glass or rice noodles. Ginger, lime, and edamame create a light and refreshing flavor in this dish that can be enjoyed hot or cold as leftovers the next day.

    Spaghetti squash can take a long time to cook in the oven, but the Instant Pot cooks the squash in a fraction of the time. Prepare the vegetables while the squash cooks, and this recipe can go from pantry to plate in just about 30 minutes!

    Find more diabetes-friendly Instant Pot recipes here.


    20 min prep time


    17 min cook time


    6servings


    About 1 1/2 cups

    Print Recipe >

    Step-By-Step Instructions:

    1. Pierce the squash over the entire surface with the tip of a sharp knife. Place in the microwave and set on high for 2 minutes. Using 2 dish towels or pot holders, carefully remove the squash from the microwave (it will be hot). Cut the squash in half crosswise, not lengthwise. Scrape out the seeds and connecting strands with a spoon.
    2. Place the water and a trivet in the Instant Pot. Place the 2 squash halves on the trivet. Seal the lid, close the valve, and set the Manual/Pressure Cook button to 7 minutes.
    3. Use a quick pressure release. Meanwhile, combine the soy sauce, juice of 1 of the limes, sugar, ginger, and crushed pepper flakes in a small bowl. Whisk until well blended and set aside.
    4. When the valve drops, carefully remove the lid. Remove the squash halves and place on a cutting board. Remove the trivet.
    5. Press the Cancel button and set to Sauté. Then press the Adjust button to “More” or “High.” Add the edamame to the water, bring to a boil, and boil for 2 minutes. Drain well.
    6. To create long spaghetti squash strands, run a fork around the outer edges of the squash to release the strands, rather than “raking through” the strands.
    7. Place the squash in a large serving bowl or divide among 6 individual bowls. Top the squash evenly with the edamame, carrots, and green onion, spoon the soy sauce mixture evenly over all, and sprinkle with the nuts and cilantro. Do not stir. Cut the remaining lime into 6 wedges and serve with the squash to squeeze over all.
    pinterestfacebooktwittermail

    Nutrition facts

    6 Servings


    • Serving Size

      About 1 1/2 cups


    • Amount per serving


      Calories


      180

    • % Daily value*

    • Total Fat
      8g

      10%

      • Saturated Fat
        0.7g

        4%
      • Trans Fats
        0g

    • Cholesterol
      0mg

      0%

    • Sodium
      320mg

      14%

    • Total Carbohydrate
      21g

      8%

      • Dietary Fiber
        6g

        21%
      • Total Sugars
        9g

    • Protein
      10g

    • Potassium
      820mg

      17%

    Ingredients

    spaghetti squash
    1 (about 3 lbs)

    water
    1 cup

    lower sodium soy sauce
    3 tbsp

    limes
    2

    sugar
    4 tsp

    grated fresh ginger
    1 tbsp

    crushed red pepper flakes
    1/8 tsp

    frozen shelled edamame
    12 oz

    matchstick carrots
    1 cup

    chopped green onion
    1/2 cup

    unsalted peanuts or slivered almonds (chopped)
    2 oz

    chopped fresh cilantro
    1/2 cup

  • Instant Pot Lentils and Poached Eggs

    Instant Pot Lentils and Poached Eggs

    How to Make Instant Pot Lentils and Poached Eggs

    Zesty lentils pair beautifully with a creamy poached egg in this dish that is great anytime of day! Enjoy it in the morning for a high-fiber, high-protein breakfast that will leave you full until lunchtime. For an even quicker and easier meal, make the lentils ahead of time. You can poach the eggs in the Instant Pot in the time it takes to reheat the lentils in the microwave!

    Find more diabetes-friendly Instant Pot recipes here.


    13 min prep time


    19 min cook time


    4servings


    3/4 cup lentil mixture with 1 egg

    Print Recipe >

    Step-By-Step Instructions:

    1. Place the lentils, bay leaves, and 2 cups of the water in the Instant Pot. Seal the lid, close the valve, and set the Manual/Pressure Cook button to 7 minutes.
    2. Meanwhile, in a small bowl, whisk together the oil, parsley, lemon zest and juice, and 1/4 tsp of the salt. Set aside.
    3. Coat 4 (6-oz) ramekins with cooking spray and crack 1 egg into each ramekin. Set aside.
    4. Use a quick pressure release. When the valve drops, carefully remove the lid and drain the lentils, (discarding the lentil water and 2 bay leaves). Return the lentils to the Instant Pot with the spinach and 1/4 tsp of the salt. Toss until the spinach is just wilted and divide it between 4 soup bowls. Cover to keep warm.
    5. Add 1 cup of water to the pot, add a trivet and 3 ramekins. Stack the 4th ramekin on top of the other ramekins. Seal the lid, close the valve, press the Cancel button, and reset the Manual/Pressure Cook button to 1 minute.
    6. Use a natural pressure release for 1 minute, followed by a quick pressure release. When the valve drops, carefully remove the lid. Remove the ramekins and drain off any excess water that may have accumulated while cooking. Carefully run a knife around outer edges of each egg to release from the ramekin easily.
    7. Spoon equal amounts of the oil mixture on top of each serving of lentils and top with the eggs. Sprinkle with black pepper.
    pinterestfacebooktwittermail

    Nutrition facts

    4 Servings


    • Serving Size

      3/4 cup lentil mixture with 1 egg


    • Amount per serving


      Calories


      280

    • % Daily value*

    • Total Fat
      15g

      19%

      • Saturated Fat
        3g

        15%
      • Trans Fats
        0g

    • Cholesterol
      185mg

      62%

    • Sodium
      390mg

      17%

    • Total Carbohydrate
      22g

      8%

      • Dietary Fiber
        9g

        32%
      • Total Sugars
        2g

    • Protein
      16g

    • Potassium
      590mg

      13%

    Ingredients

    dried green or brown lentils (rinsed and drained)
    3/4 cup

    bay leaves
    2

    water (divided)
    3 cup

    olive oil
    3 tbsp

    grated zest and juice of 1 lemon
    1

    finely chopped fresh parsley
    1 tbsp

    salt (divided)
    1/2 tsp

    nonstick cooking spray
    1

    eggs
    4

    baby spinach
    4 cup

    black pepper
    1/4 tsp

  • Penne with Eggplant-Tomato Sauce

    Penne with Eggplant-Tomato Sauce

    How to Make Penne with Eggplant-Tomato Sauce

    AKA Pasta Alla Norma, this is a traditional first course offered throughout Italy. Norma was the name of an opera by Bellini that was popular when poet, writer, and scholar Nino Martoglio was so impressed by the dish that he declared it a masterpiece, like the opera. This dish is so loved that other noteworthy acts are now referred to as “alla Norma,” meaning “successful” or “grandiose,” in some parts of Sicily. This is one of my family’s favorite dishes.


    5 min prep time


    40 min cook time


    8servings


    1 cup

    Print Recipe >

    Step-By-Step Instructions:

    1. Preheat broiler. Using a sharp knife, slice eggplant into 1/4-inch slices, and place on a baking sheet. Brush the eggplant with 2 Tbsp olive oil, then broil for 5–7 minutes per side until they are dark gold and cooked through. Set aside to cool. (This step can be done a day in advance.)

    2. Heat remaining olive oil in a large saucepan over medium heat. Add garlic and cook until it begins to release its aroma, but do not allow garlic to turn color.

    3. Pour in tomatoes, and stir. Add crushed red pepper, basil, salt, and freshly ground pepper. Cover, reduce heat to low, and simmer for 20 minutes.

    4. When eggplant is cool enough to handle, stack three slices together, and chop into dime-size pieces. Repeat until all eggplant is chopped.

    5. While sauce is still cooking, bring a gallon of water to a boil over high heat. Add pasta and cook until al dente.

    6. After sauce has cooked for 20 minutes, turn off heat, remove lid, and add eggplant pieces and cheese. Stir well. Cover, and simmer sauce over medium heat until pasta is done cooking (10–12 minutes).

    7. Drain pasta. Toss in sauce to coat. Serve hot garnished with chopped basil (if desired).

    pinterestfacebooktwittermail

    Nutrition facts

    8 Servings


    • Serving Size

      1 cup


    • Amount per serving


      Calories


      280

    • % Daily value*

    • Total Fat
      10g

      13%

      • Saturated Fat
        2.5g

        13%
      • Trans Fats
        0g

    • Cholesterol
      5mg

      2%

    • Sodium
      250mg

      11%

    • Total Carbohydrate
      46g

      17%

      • Dietary Fiber
        8g

        29%
      • Total Sugars
        8g
      • Added Sugars
        0g

        0%

    • Protein
      11g

    • Potassium
      760mg

      16%

    Ingredients

    large eggplants
    2 (about 2 lb total)

    olive oil (divided)
    1/4 cup

    garlic (minced)
    2 clove

    no-salt-added strained tomatoes or tomato puree
    1 (26-oz) box or can

    crushed red pepper flakes
    1 tsp

    fresh basil (roughly torn)
    6 sprig

    salt
    1/4 tsp

    black pepper
    to taste

    dried whole-wheat penne rigate, or gluten-free pasta
    3/4 lbs

    grated pecorino Romano cheese
    1/2 cup

  • Beef Sancocho

    Beef Sancocho

    How to Make Beef Sancocho

    My grandparents would make sancocho over an open fire in their backyard; the wood smoke added so much flavor to the dish. Sancocho comes from the verb sancochar, which means to parboil. It is a very hearty soup common in all of Latin America, made of stewing hen, beef, and innards and served for lunch. Don’t worry; you don’t have to start a fire to make this version!

    Receta en Español: Sancocho Carne de Res

    To make your own salt-free Adobo seasoning, combine 1 tbsp each of lemon pepper, garlic powder, onion powder, dried oregano, dried parsley, and achiote powder and 1/2 tbsp cumin. Store in an airtight container for up to 2 weeks. 


    20 min prep time


    2 hr cook time


    6servings


    1 1/3 cups

    Print Recipe >

    Step-By-Step Instructions:

    1. Heat the oil in a nonstick Dutch oven or large nonstick saucepot over medium-high heat. Add the beef and cook, turning occasionally, until browned, about 5 minutes. Add the onion, bell pepper, cubanelle, celery, and garlic. Cook, stirring occasionally, until the vegetables are tender, about 8 minutes.
    2. Add the broth, tomato sauce, adobo seasoning, salt, and bay leaves; bring to a boil. Reduce the heat to medium low. Cover and simmer until the meat is just tender, about 1 hour.
    3. Add the yucca, plantain, chayote squash, and tomato and cook, stirring occasionally, until the meat and vegetables are fork-tender, about 40 minutes.
    4. Remove from the heat. Remove and discard the bay leaves; stir in the cilantro.
    pinterestfacebooktwittermail

    Nutrition facts

    6 Servings


    • Serving Size

      1 1/3 cups


    • Amount per serving


      Calories


      230

    • % Daily value*

    • Total Fat
      3.5g

      4%

      • Saturated Fat
        0.9g

        5%
      • Trans Fats
        0g

    • Cholesterol
      20mg

      7%

    • Sodium
      320mg

      14%

    • Total Carbohydrate
      40g

      15%

      • Dietary Fiber
        4g

        14%
      • Total Sugars
        9g

    • Protein
      12g

    • Potassium
      720mg

      15%

    Ingredients

    olive oil
    2 tsp

    lean top round beef (cut into 1-inch chunks)
    1/2 lbs

    onion (chopped)
    1

    green bell pepper (chopped)
    1

    cubanelle or anaheim pepper (chopped)
    1

    celery (chopped)
    2 stalks

    garlic (chopped)
    3 clove

    unsalted beef broth
    32 oz

    no-salt-added tomato sauce
    1/4 cup

    Adobo seasoning
    1 tbsp

    salt
    1/2 tsp

    bay leaves
    3

    fresh or frozen yucca (thawed and cut into 2-inch pieces)
    3/4 lb (about 2 cups)

    green plantain (peeled and cut into 1-inch pieces)
    1

    chayote squash (peeled and cut into 2-inch cubes)
    1

    tomato (chopped)
    1

    chopped fresh cilantro
    1 cup

  • Creamy Gravy

    Creamy Gravy

    How to Make Creamy Gravy

    Creamy, pepper-seasoned gravy is a staple in southern comfort foods like biscuits and gravy and chicken fried steak. This diabetes-friendly version uses a vegetable oil-based margarine to reduce the saturated fat that’s usually found in traditional gravy. Serve this with Air Fryer Buttermilk Chicken and Southern Collard Greens for the ultimate southern comfort meal!


    5 min cook time


    4servings


    2 tbsp

    Print Recipe >

    Step-By-Step Instructions:

    1. Melt reduced-fat stick margarine in a small saucepan over medium-high heat. 

    2. Stir in all-purpose flour and cook for 1 minute, stirring constantly and blending until the mixture is smooth. Season with coarse ground black pepper. 

    3. Gradually blend in skim milk. Cook, stirring constantly, until mixture bubbles and thickens.

    pinterestfacebooktwittermail

    Nutrition facts

    4 Servings


    • Serving Size

      2 tbsp


    • Amount per serving


      Calories


      50

    • % Daily value*

    • Total Fat
      3g

      4%

      • Saturated Fat
        0.9g

        5%
      • Trans Fats
        0g

    • Cholesterol
      0mg

      0%

    • Sodium
      40mg

      2%

    • Total Carbohydrate
      4g

      1%

      • Dietary Fiber
        0g

        0%
      • Total Sugars
        2g

    • Protein
      2g

    • Potassium
      70mg

      1%

    Ingredients

    margarine stick
    1 tbsp

    all-purpose flour
    1 1/2 tbsp

    coarse-ground black pepper
    1/4 tsp

    skim milk
    2/3 cup

  • Air Fryer Buttermilk Fried Chicken

    Air Fryer Buttermilk Fried Chicken

    How to Make Air Fryer Buttermilk Fried Chicken

    Is it possible to make fried chicken diabetes-friendly? Absolutely! Especially if you have an air fryer. This small appliance “fries” food with hot circulating air, so you can create the crispy, crunchy exterior or frying with a fraction of the fat and calories from traditional deep frying. This recipe creates juicy, flavorful fried chicken by marinating the chicken in buttermilk, then coating it in a cornflake crust. Then the air fryer works its magic and delivers this fried chicken that’s crispy, tender, and loaded with flavor! Top this chicken with a reduced-fat Creamy Gravy and pair with a side of Southern Collard Greens for the ultimate southern comfort meal!

    Looking for more diabetes-friendly air fryer recipes? Check out this article. 

    Watch How to Make Air Fryer Buttermilk Fried Chicken

    Powered by Homemade


    25 min prep time


    15 mintues cook time


    4servings


    1 (4 ozs) piece of chicken

    Print Recipe >

    Step-By-Step Instructions:

    1. In a small, deep bowl, stir together the buttermilk and hot sauce. Place the chicken in the buttermilk mixture. Allow to stand 15 minutes.

    2. Place the cornflakes into the work bowl of a food processor. Process until coarse crumbs form. Add the cornmeal, garlic powder, paprika, salt, and pepper and pulse until evenly mixed. Pour the crumbs into a shallow bowl. (if you don’t have a food processor, you can crush the cornflakes in a plastic bag with a rolling pin.)

    3. Drain the chicken, allowing the excess buttermilk to drip back into bowl. Coat the chicken pieces evenly in the cornflake mixture. Place the coated chicken pieces on a wire rack.

    4. Place the chicken in the air fryer basket. Spray with nonstick cooking spray for 2 seconds (do not crowd the chicken; cook in batches if all the chicken doesn’t fit). Set the temperature to 375°F and air fry for 7 minutes. 

    5. Turn the chicken pieces. Air fry for an additional 7–10 minutes or until the chicken is done and a meat thermometer inserted in the center registers 165°F.

    pinterestfacebooktwittermail

    Nutrition facts

    4 Servings


    • Serving Size

      1 (4 ozs) piece of chicken


    • Amount per serving


      Calories


      160

    • % Daily value*

    • Total Fat
      3.5g

      4%

      • Saturated Fat
        0.8g

        4%
      • Trans Fats
        0g

    • Cholesterol
      65mg

      22%

    • Sodium
      190mg

      8%

    • Total Carbohydrate
      7g

      3%

      • Dietary Fiber
        1g

        4%
      • Total Sugars
        0g

    • Protein
      24g

    • Potassium
      230mg

      5%

    Ingredients

    low-fat buttermilk
    1/3 cup

    hot sauce
    1/4 tsp

    boneless, skinless chicken breasts (cut in half lengthwise to make 4 equal portions)
    1 lbs

    corn flakes
    6 tbsp

    stone-ground cornmeal
    3 tbsp

    garlic powder
    1 tsp

    paprika
    1 tsp

    salt
    1/4 tsp

    black pepper
    1/4 tsp

    nonstick cooking spray
    1 whole

  • Easy Chicken Panini

    Easy Chicken Panini

    How to Make Easy Chicken Panini


    A toasty panini with crispy bread, warm tasty filling, and melty cheese makes a satisfying, diabetes-friendly lunch or light dinner. Cook the paninis in a pan (cast iron works great here) over low heat so that the filling warms all the way through without burning buring the bread. This is a great meal prep recipe: assemble all of the sandwiches ahead of time and wrap individually in foil, then toast the panini just before serving. Pair this sandwich with a simple side salad, like this Spinach, Avocado, and Summer Berry Saladfor a balanced, heart-healthy meal.

    Double Up: Cook a bouble batch of chicken when preparing a recipe like Herbed Tarragon Chicken with Mushrooms and save the leftover chicken to make these quick paninis later in the week!

    This recipe is from The 12-Week Diabetes Cookbook by Linda Gassenheimer. 


    5 min prep time


    5 min cook time


    8servings


    1/2 panini

    Print Recipe >

    Step-By-Step Instructions:

    1. Assemble the sandwiches: Spread 1 Tbsp of mayonnaise on each of 4 slices of bread. Top each with the tarragon, cheese, and chicken, dividing the ingredients evenly among the four slices. Sprinkle each with the salt and pepper, then top each sandwich with the remaining slices of bread.
    2. Coat a nonstick skillet (large enough to hold the paninis) with olive oil spray and heat over low heat. Add the paninis and press down with a lid or another clean pan. Cook for 2 minutes, flip, and press again. Cook for another 2 minutes. (You can also use a panini press and cook until the cheese is melted and the bread is golden.)
    3. Cut each panini in half and serve each half with salad.
    pinterestfacebooktwittermail

    Nutrition facts

    8 Servings


    • Serving Size

      1/2 panini


    • Amount per serving


      Calories


      240

    • % Daily value*

    • Total Fat
      9g

      12%

      • Saturated Fat
        3g

        15%
      • Trans Fats
        0g

    • Cholesterol
      65mg

      22%

    • Sodium
      330mg

      14%

    • Total Carbohydrate
      14g

      5%

      • Dietary Fiber
        2g

        7%
      • Total Sugars
        2g

    • Protein
      28g

    • Potassium
      250mg

      5%

    Ingredients

    light mayonnaise
    4 tbsp

    crusty whole-wheat bread
    8 slices (about 1 oz each)

    fresh tarragon
    1/2 cup

    reduced-fat Swiss cheese
    4 slices (6 oz total)

    cooked chicken breast (sliced)
    16 oz

    salt
    1/4 tsp

    black pepper
    1/4 tsp

    olive oil spray
    1

  • Tarragon Herbed Chicken and Mushrooms

    Tarragon Herbed Chicken and Mushrooms

    How to Make Tarragon Herbed Chicken and Mushrooms

    A favorite of French cuisine, tarragon adds a fragrant, licorice-like flavor to chicken. If tarragon isn’t your thing, try this recipe with another herb like basil, cilantro, or dill. You can also sub dried herbs for fresh: sub 1 teaspoon dried herb for each tablespoon of fresh herb. You can buy thin-cut chicken breast cutlets in the store, or buy whole chicken breast and cut them in half to make cutlets that are about 1/2-inch thick. Pair this chicken with Easy Half-Mashed Potatoes with Cauliflower for a diabetes-friendly meal with less carbs, but all the comfort!

    Double Up: Cook double the chicken in this recipe and use the leftovers for Easy Chicken Paninis later in the week!


    10 min prep time


    10 min cook time


    4servings


    4 oz chicken with 1/3 cup herbed mushrooms

    Print Recipe >

    Step-By-Step Instructions:

    1. Coarsely chop the tarragon, parsley, and mushrooms together in a food processor or by hand. Set aside.

    2. Coat a large nonstick skillets with olive oil spray, and heat over medium-high heat.

    3. Brown the chicken breasts for 4 minutes on each side, or until a meat thermometer inserted into the chicken reads 165° F. Remove the chicken from the pan. (if doubling the chicken, cook in two pans; set aside half of the chicken to cool, then store in a tightly sealed container in the fridge for up to 3 days.)

    4. Divide the chicken between 4 dinner plates and sprinkle with the salt and pepper.

    5. Add the olive oil to the pan along with the garlic and chopped herbs and mushrooms. Toss to warm through, about 1 minute. Spoon over the plated chicken. Serve with an additional vegetable or whole grain side dish.

    pinterestfacebooktwittermail

    Nutrition facts

    4 Servings


    • Serving Size

      4 oz chicken with 1/3 cup herbed mushrooms


    • Amount per serving


      Calories


      230

    • % Daily value*

    • Total Fat
      8g

      10%

      • Saturated Fat
        1.6g

        8%
      • Trans Fats
        0g

    • Cholesterol
      95mg

      32%

    • Sodium
      380mg

      17%

    • Total Carbohydrate
      2g

      <1%

      • Dietary Fiber
        1g

        4%
      • Total Sugars
        0g

    • Protein
      36g

    • Potassium
      420mg

      9%

    Ingredients

    fresh tarragon
    3 tbsp

    fresh parsley
    3/4 cup

    sliced baby portabello mushrooms
    3/4 cup

    boneless, skinless chicken breast cutlets
    1 1/2 lbs

    salt
    1/2 tsp

    black pepper
    1/4 tsp

    olive oil
    1 tbsp

    garlic (crushed)
    1 clove

  • Tropical Kale Quinoa Salad

    Tropical Kale Quinoa Salad

    How to Make Tropical Kale Quinoa Salad

    This is a great side for those who like a little sweet in an otherwise savory dish. You can make this dish ahead of time and serve it warm or cold.


    15 min prep time


    20 min cook time


    4servings


    3/4 cup

    Print Recipe >

    Step-By-Step Instructions:

    1. Combine the quinoa, kale mixture, coconut and almonds, and the rest of the ingredients. Stir well. Scoop equal amounts into bowls and serve warm or cold, according to your preference.
    2. Place the coconut and almonds on a baking sheet and toast in the oven for about 6 minutes. Stir every 2 minutes to prevent burning.
    3. Heat the oil in a nonstick pan over medium-high heat. Sauté the kale and pineapple chunks for about 4 minutes.
    4. Cook the quinoa according to the package instructions, omitting any added salt.
    5. Preheat the oven to 350° F.
    pinterestfacebooktwittermail

    Nutrition facts

    4 Servings


    • Serving Size

      3/4 cup


    • Amount per serving


      Calories


      230

    • % Daily value*

    • Total Fat
      11g

      14%

      • Saturated Fat
        2.4g

        12%
      • Trans Fats
        0g

    • Cholesterol
      0mg

      0%

    • Sodium
      20mg

      <1%

    • Total Carbohydrate
      30g

      11%

      • Dietary Fiber
        5g

        18%
      • Total Sugars
        11g

    • Protein
      7g

    • Potassium
      520mg

      11%

    Ingredients

    orange juice
    3 tbsp

    chopped fresh ginger
    1 tbsp

    green onions (chopped)
    2

    slivered almonds
    1/4 cup

    unsweetened coconut flakes
    2 tbsp

    canned no-sugar-added pineapple chunks in juice
    1/2 (20-oz) can

    chopped fresh kale
    6 cup

    olive oil
    1 tbsp

    dry tricolor quinoa
    1/2 cup

  • Spinach, Avocado, and Summer Berry Salad

    Spinach, Avocado, and Summer Berry Salad

    How to Make Spinach, Avocado, and Summer Berry Salad

    This superfood salad is packed with antioxidants and bright, summery flavors. Pair it with a grilled chicken dish, like these Grilled Lime Chicken Fajitas, or fish, like this Grilled Salmon with Mango and Tomato Salsa.

    Looking for an easier way to make salad dressing? Add all of the dressing ingredients to a jar with a lid. Screw the lid on tightly and shake well until everything is combined. If you’re making this salad ahead of time, wait to add the dressing until right before serving.


    15 min prep time


    8servings


    1 cup

    Print Recipe >

    Step-By-Step Instructions:

    1. Place the spinach, strawberries, blueberries, avocado, and onion in a large salad bowl.
    2. In a small bowl, whisk together the olive oil, vinegar, honey, lime juice, garlic, and black pepper.
    3. Pour the dressing over the salad and toss to evenly coat.
    pinterestfacebooktwittermail

    Nutrition facts

    8 Servings


    • Serving Size

      1 cup


    • Amount per serving


      Calories


      90

    • % Daily value*

    • Total Fat
      6g

      8%

      • Saturated Fat
        0.9g

        5%
      • Trans Fats
        0g

    • Cholesterol
      0mg

      0%

    • Sodium
      30mg

      1%

    • Total Carbohydrate
      9g

      3%

      • Dietary Fiber
        3g

        11%
      • Total Sugars
        4g

    • Protein
      2g

    • Potassium
      350mg

      7%

    Ingredients

    fresh baby spinach
    10 oz

    diced or sliced strawberries
    1 cup

    blueberries
    1/2 cup

    avocado (diced)
    1

    finely diced or sliced red onion
    1/3 cup

    olive oil
    2 tbsp

    white balsamic or champagne vinegar
    2 tbsp

    honey
    1 tsp

    lime (juiced)
    1/2 large

    garlic (minced)
    1 clove

    black pepper
    1/4 tsp